There is a software that starts by itself with your Windows 11 computer and it bothers you? Is your PC getting slower and slower? There are too many icons opening at the bottom right near the time? Tired of Steam or Teams opening on its own every time when you rarely use them?
All these problems have a fairly simple but not intuitive solution. This tutorial explains how see all programs that start on their own with a Windows 11 computer and also show how disable automatic start of software and games that bother you. This how-to works both at home and at work, on Windows 11 Home and Pro.
The process is easy to follow thanks to this detailed step-by-step tutorial with an example of use. This procedure is almost identical on Windows 10 and Windows 8.1. However, if you need help with this guide or for another computer question, you can submit a free request for assistance on the forum Windows Facile.
View list of programs that start with Windows 11
1. On the Windows 11 computer, do a right click on the taskbar (the horizontal bar at the very bottom of the screen) et make a left click on « Task Manager » :
![]()
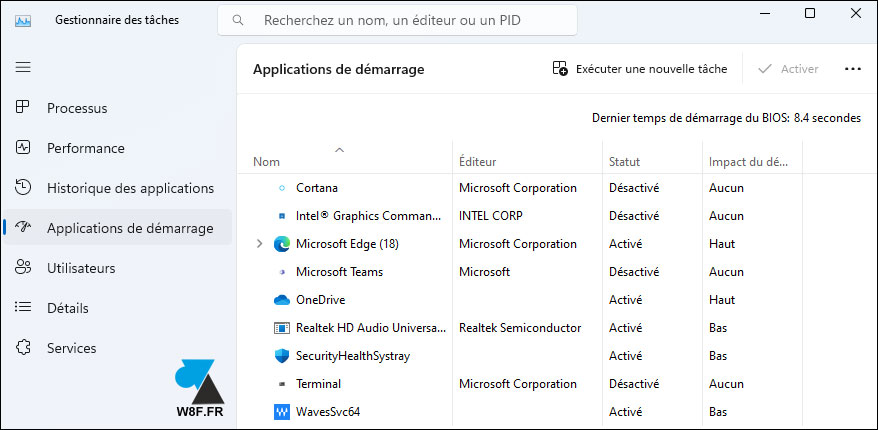
2. In the window that opens, click on ” Starter apps » from the left menu:
![]()
3. This displays the list of all the programs that are configured to start automatically with Windows, that is to say that launch themselves after opening a session on the computer.
Disable some software from Windows 11 autostart
1. In the list of applications, drag right click on the line of a program that no longer starts and click on ” Disable with a left click:
![]()
2. The line in question therefore changes to “Disabled” status:
![]()
3. Repeat for all programs and games to be disabled.

4. Restart the computer Windows 11 to confirm that apps no longer start automatically.


Leave a Comment