
While network equipment (switch, firewall, router) can use the SSH communication protocol, many peripherals require the use of telnet to control them remotely. Telnet is also useful for checking that a TCP or UDP network port is open on a remote machine, for example to access the DBMS from a local network server.
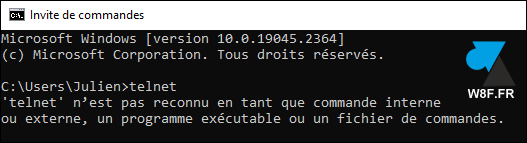
By default, Windows 11 does not enable the Telnet client and using this protocol within a Command Prompt (cmd) results in the following message: “telnet is not recognized as an internal or external command, executable program or a batch file”.
This tutorial explains how install and enable Telnet on Windows 11 to be able to connect to networked devices or check the communication port of a remote server. This procedure works for Windows 11 Professional, Enterprise, and even the Home edition.
Be careful because telnet is not a secure protocol, a sniffer (Wireshark or tcpdump for example) can intercept the communications exchanged between the host and its client.
Windows 11 : installer le client Telnet
1. Use the search function to type ” telnet (this is much easier than going through multiple Windows Settings menus):
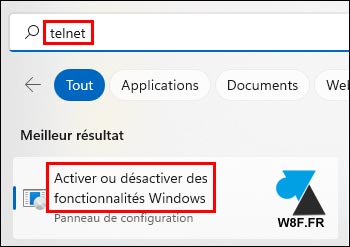
You can also use the Run console (Windows + R) and type “appwiz.cpl” to directly open the program, or go to Windows 11 Settings, Applications, Optional features, More Windows features).
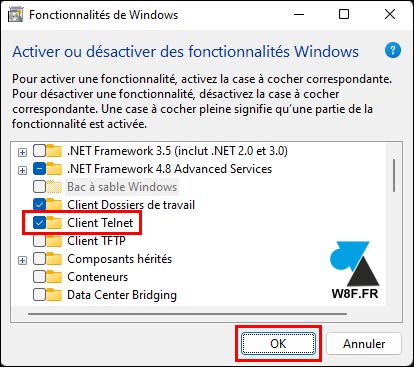
2. In the window that opens (Windows Features), tick line ” Client Telnet » and validate by OK :
3. Wait a few moments and “ Restart now » the computer if offered.
4. The telnet client is now installed and working.
Install Telnet on W11 in one command
Alternative solution, to be preferred if necessary to automate it on several Windows 11 workstations.
1. Open a Command Prompt (cmd) as administrator.
2. Type the following command:
dism /online /Enable-Feature /FeatureName:TelnetClient
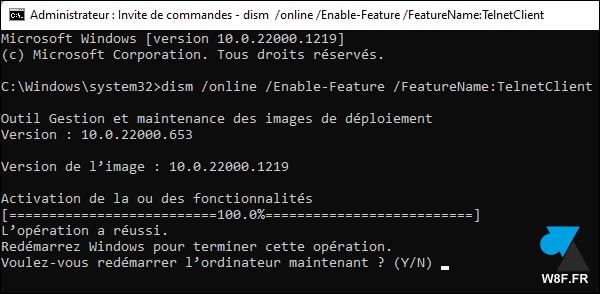
3. Restart now or later.
Leave a Comment