The feature may cause some confusion among users
Rafly is a journalist with growing experience, ranging from technology, business, social, and culture. A holder of the Romanian government scholarship, his writing has been published in several… read more
Published on
- Windows 11’s latest insider build features a hidden functionality.
- It lets you end tasks like in Task Manager.
- Here’s the catch: it can be confusing for some users.

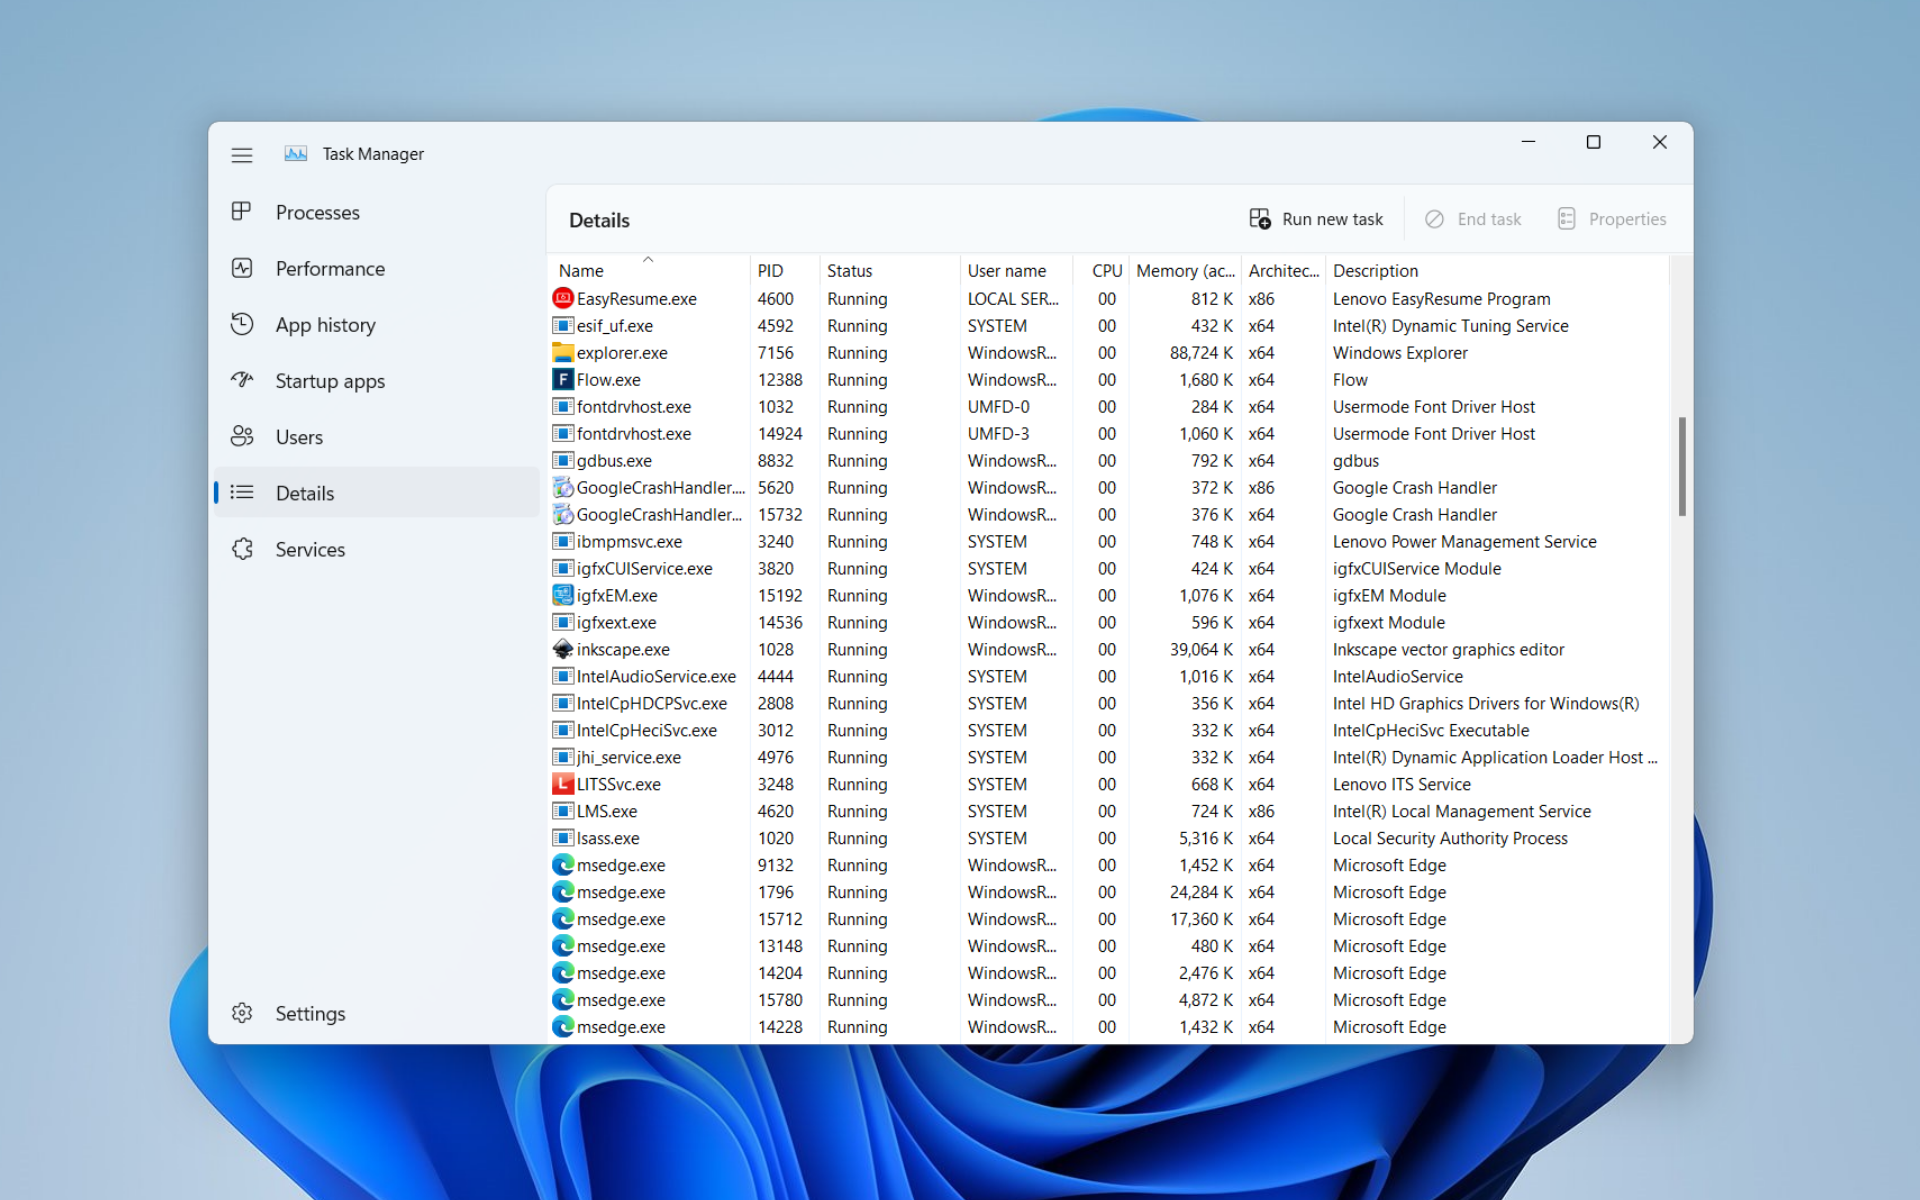
Just like what Microsoft did with the WinAppSDK-powered look of File Explorer on Windows 11 Insider Build 25300, the tech giant is reportedly rolling out a new feature that lets you End tasks from the taskbar, Task Manager style.
With this feature, you can right-click on the taskbar icon of any open window and you’ll see options to close the window and end the task, as spotted by Windows enthusiast PhantomOcean3.
“You will soon be able to quickly end an entire task/process by right clicking it on the taskbar and choosing a new ‘End task’ option, Task Manager style. New in build 25300 and hidden. Feature name is just ‘EndTask’”
Compared to closing the window, ending the task means terminating all the activities for good and killing all background processes, and it could be a game changer for users who deal with lagged apps as they wouldn’t have to go to Task Manager anymore.
The addition, however, is hidden and is met with a bit of polarizing reception from some users. They believe that it could cause confusion for users that aren’t specifically tech-savvy, or even those who are not attentive.
As mentioned, the feature is well-hidden within the Build, but with a few registry tweaks here and there, you can access and try it out.
How to enable end-task from the taskbar on Windows 11
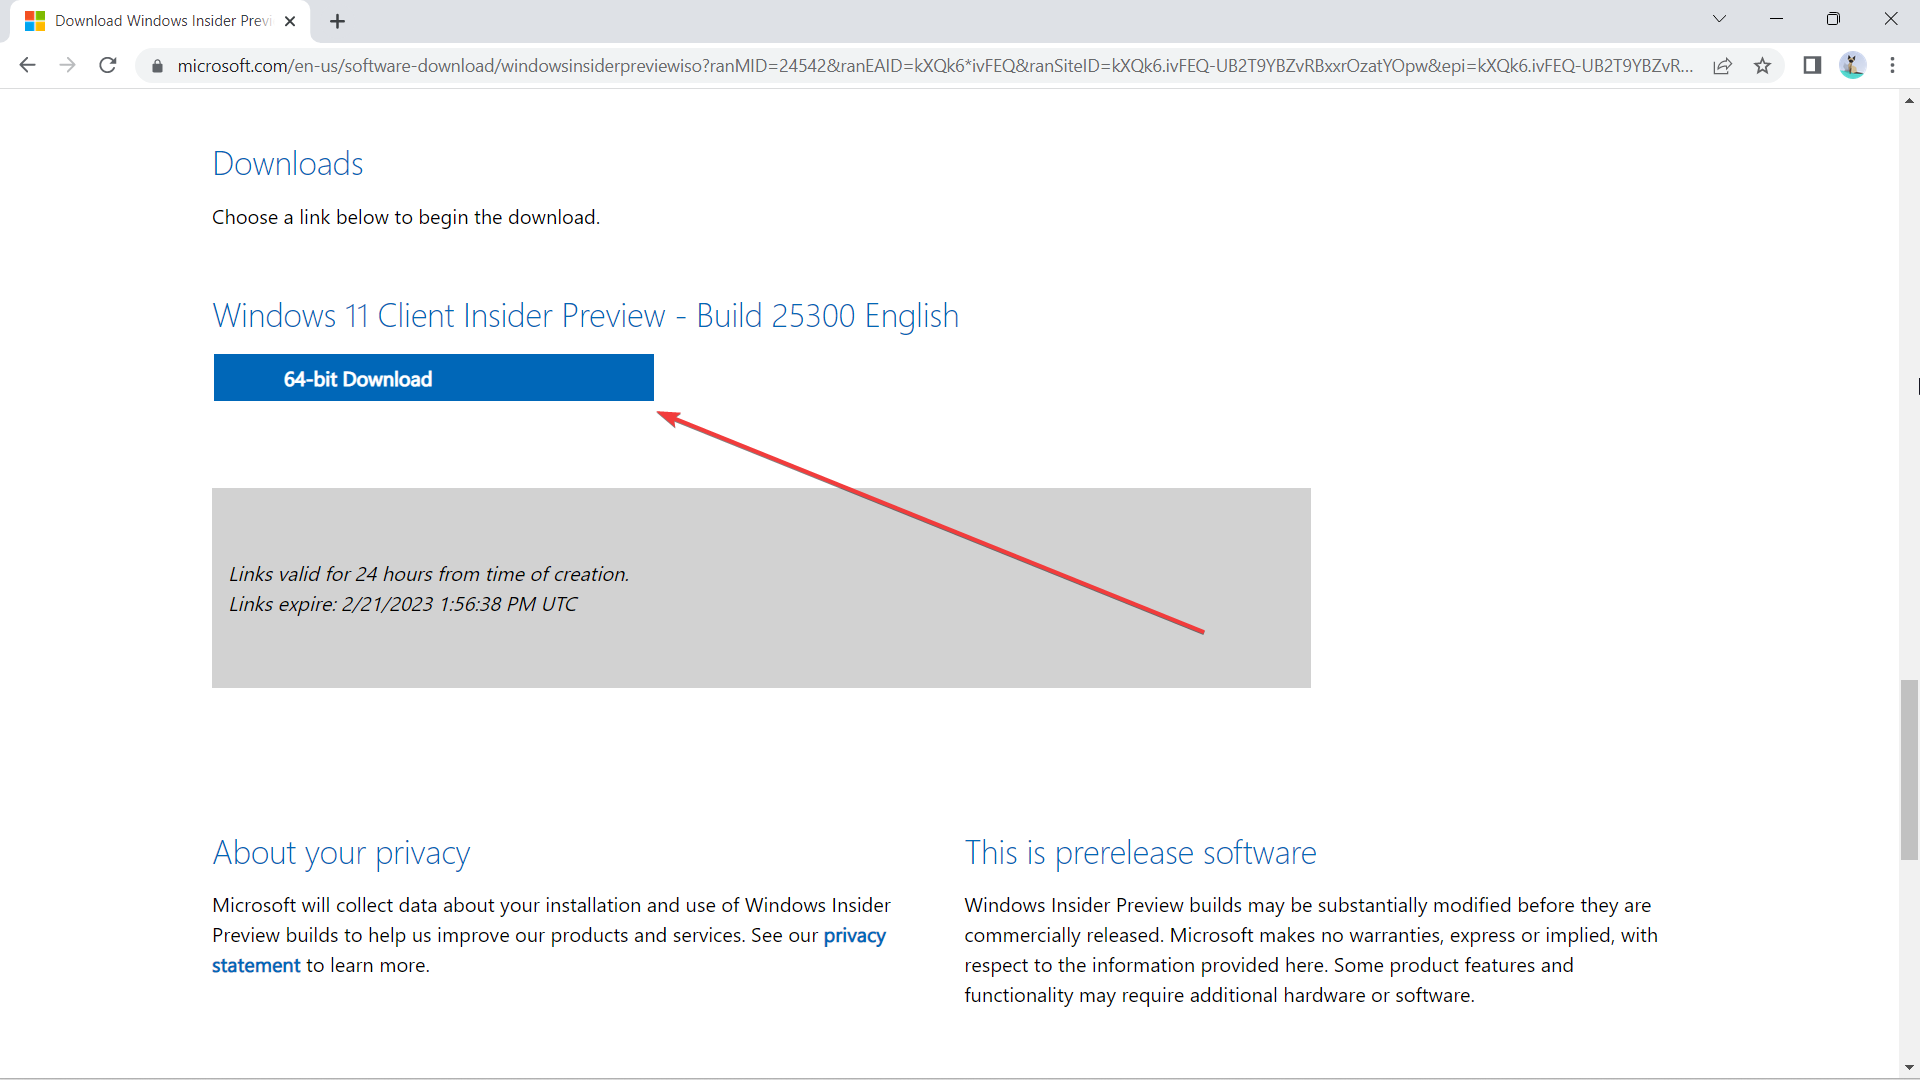
1. Make sure to have the Windows 11 Insider Build 25300 installed in your system. If not, head over Microsoft’s download page for insider builds.
2. Head over to GitHub to download the latest version of ViVeTool.
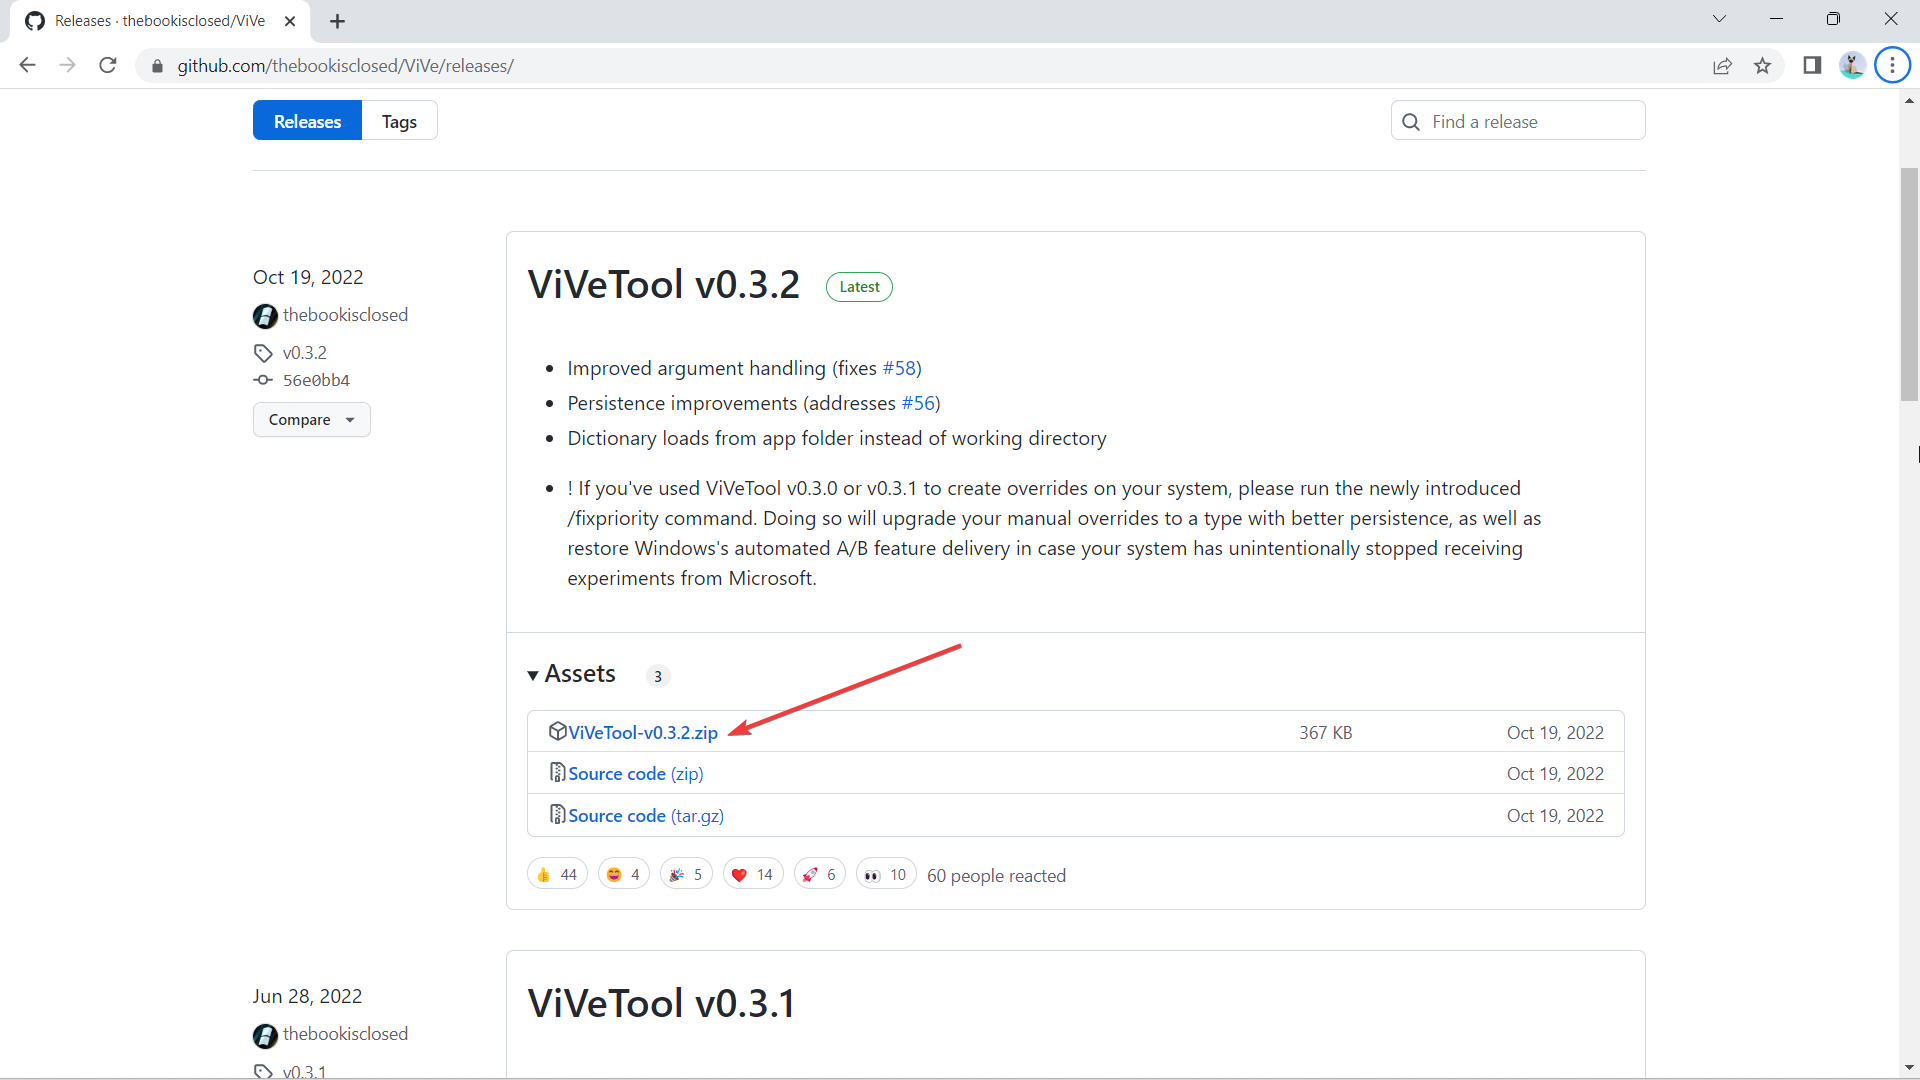
3. Once downloaded, click Extract all, select the location where you want to extract it by clicking Browse, then hit Extract.
In this case, we extract it at C:\Users\WindowsReport\Documents\Tools\ViVeTool-v0.3.2

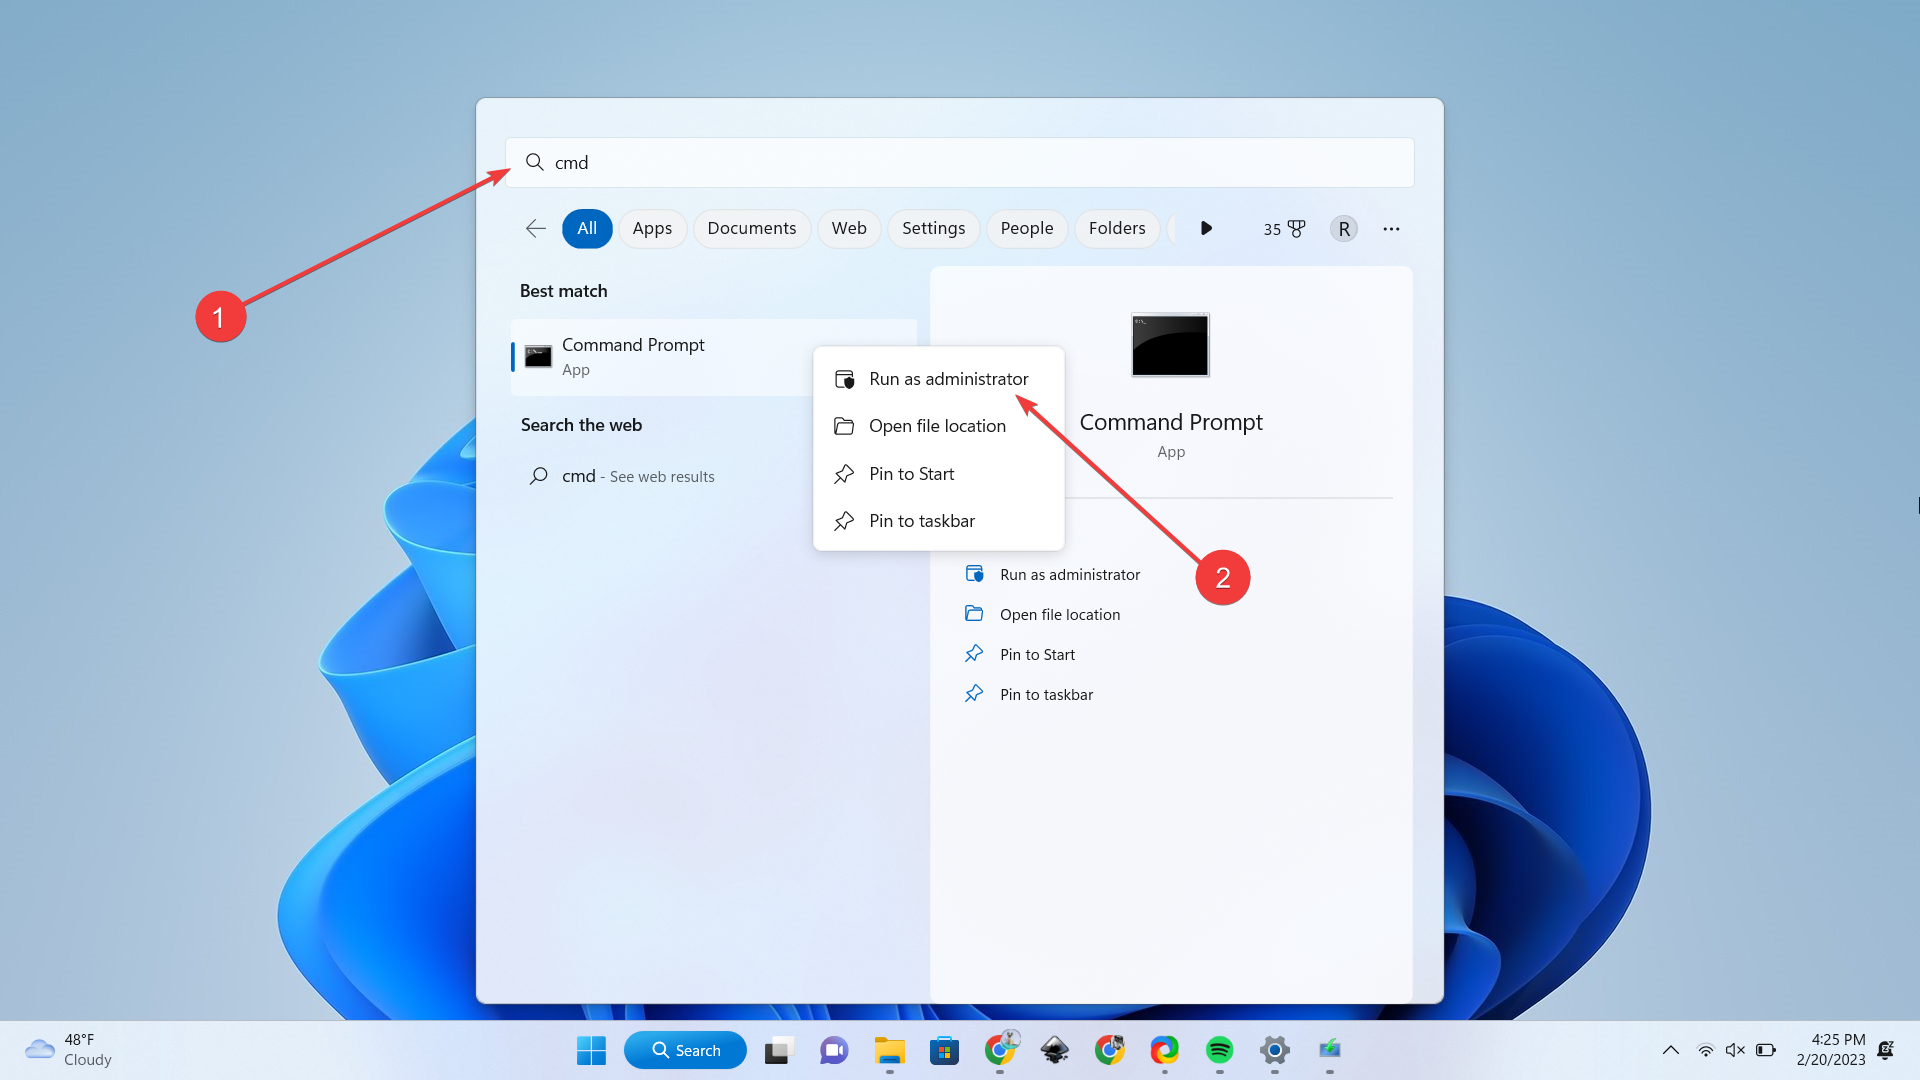
4. Hit on your keyboard, then type “cmd” and right-click -> Run as administrator.
5. Type in cd + the directory where we extracted ViVeTool. In this case, it’s at C:\Users\WindowsReport\Documents\Tools\ViVeTool-v0.3.2, then hit Enter.
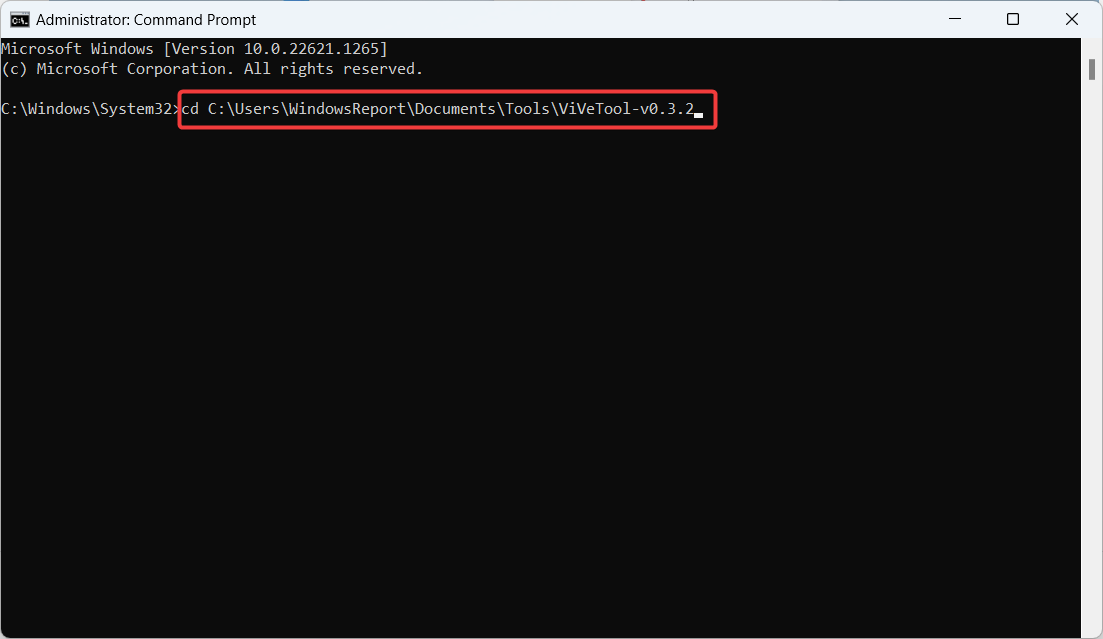
6. Type the following command then hit Enter.
vivetool /enable /id:42592269
7. Reboot the computer.
With that being said, however, the feature is not ready to be out for the public just yet. As an Insider program feature, it’s worth mentioning that you may run into some performance problems along the way.
Will you try this feature out? Let us know in the comments!
Still having issues? Fix them with this tool:
SPONSORED
If the advices above haven’t solved your issue, your PC may experience deeper Windows problems. We recommend downloading this PC Repair tool (rated Great on TrustPilot.com) to easily address them. After installation, simply click the Start Scan button and then press on Repair All.
Start a conversation
Leave a Comment